| < home > | < visual > | < music > | < links > |
Textures in Gimp for lazy people
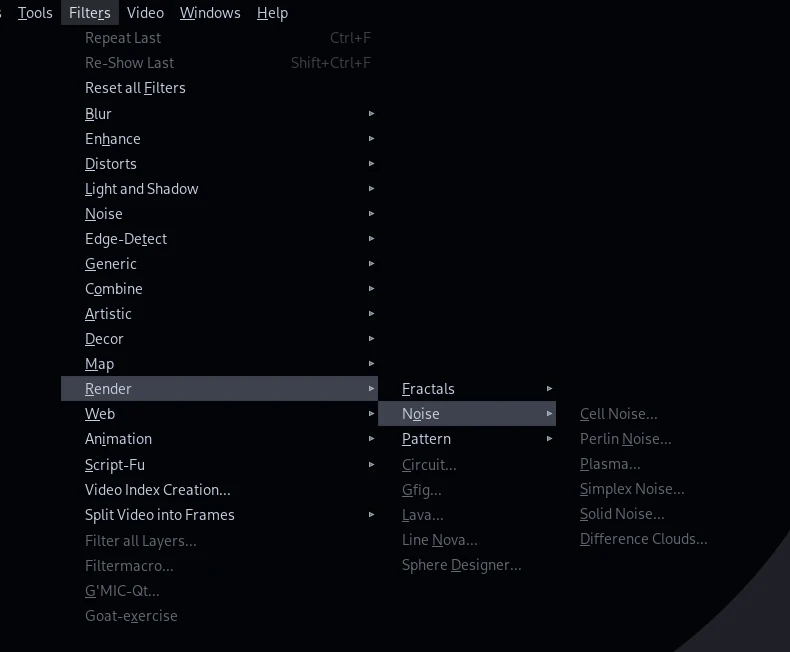 GIMP has a lovely option - multiple options - to render stuff.
When you take a look at the "render" menu you might think those are useless,
but as you explore and tinker with settings for those you might just find them a good base for some textures for backgrounds.
GIMP has a lovely option - multiple options - to render stuff.
When you take a look at the "render" menu you might think those are useless,
but as you explore and tinker with settings for those you might just find them a good base for some textures for backgrounds.
Adding to that you have some cool brushes in stock GIMP, such as oil paint imitations, sponge, acrylics, and splats. We will get back to these later.
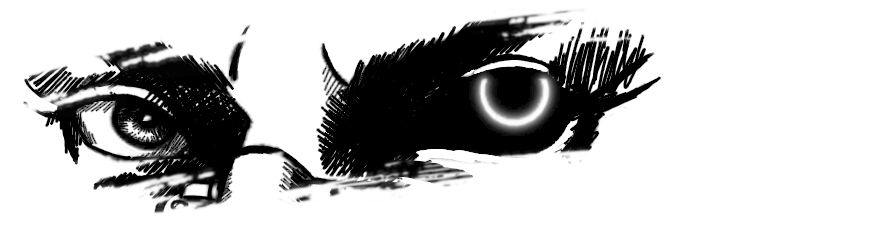
 This is a nice example.
You can make a relatively good loking "empty" background using renders and filters.
This is a nice example.
You can make a relatively good loking "empty" background using renders and filters.
The main character is still the main focus, but you do not have an empty bucket fill in the background.
Other situations you might want to consider generating your background is the night sky filled with stars, film grain effect, or space.
I will show you how to make a very quick imitation of the above. Play around with options to make something that suits you the best. These here are done merely for careless demonstration.

Start with a black or dark background layer and generate a Solid Noise (clouds) with low settings. Tinker with those numbers and generate random seed until you find a pattern you like.
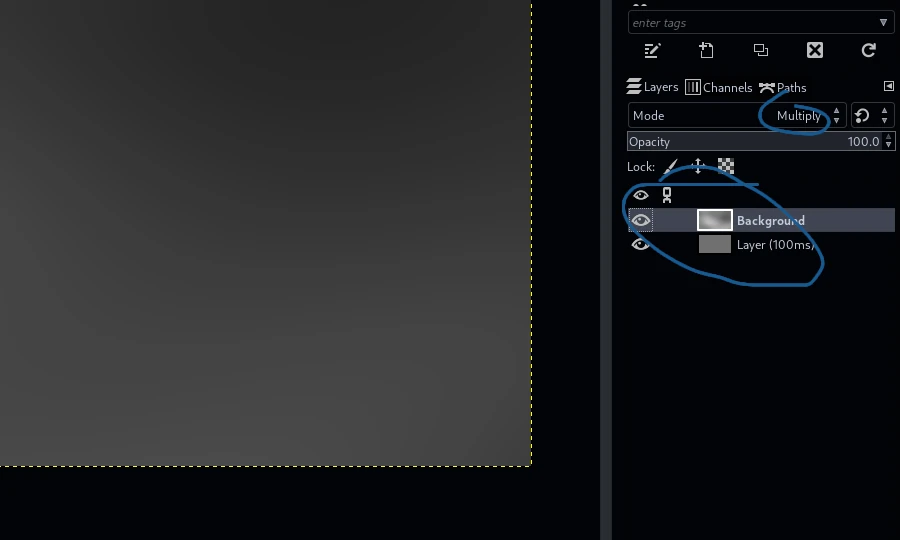
If you forgot to add separate layer for render, like me, add another for a base, and change cloudy layer mode to multiply. Feel free to adjust background color, or simply duplicate
the layer with clouds, or browse different layer modes.
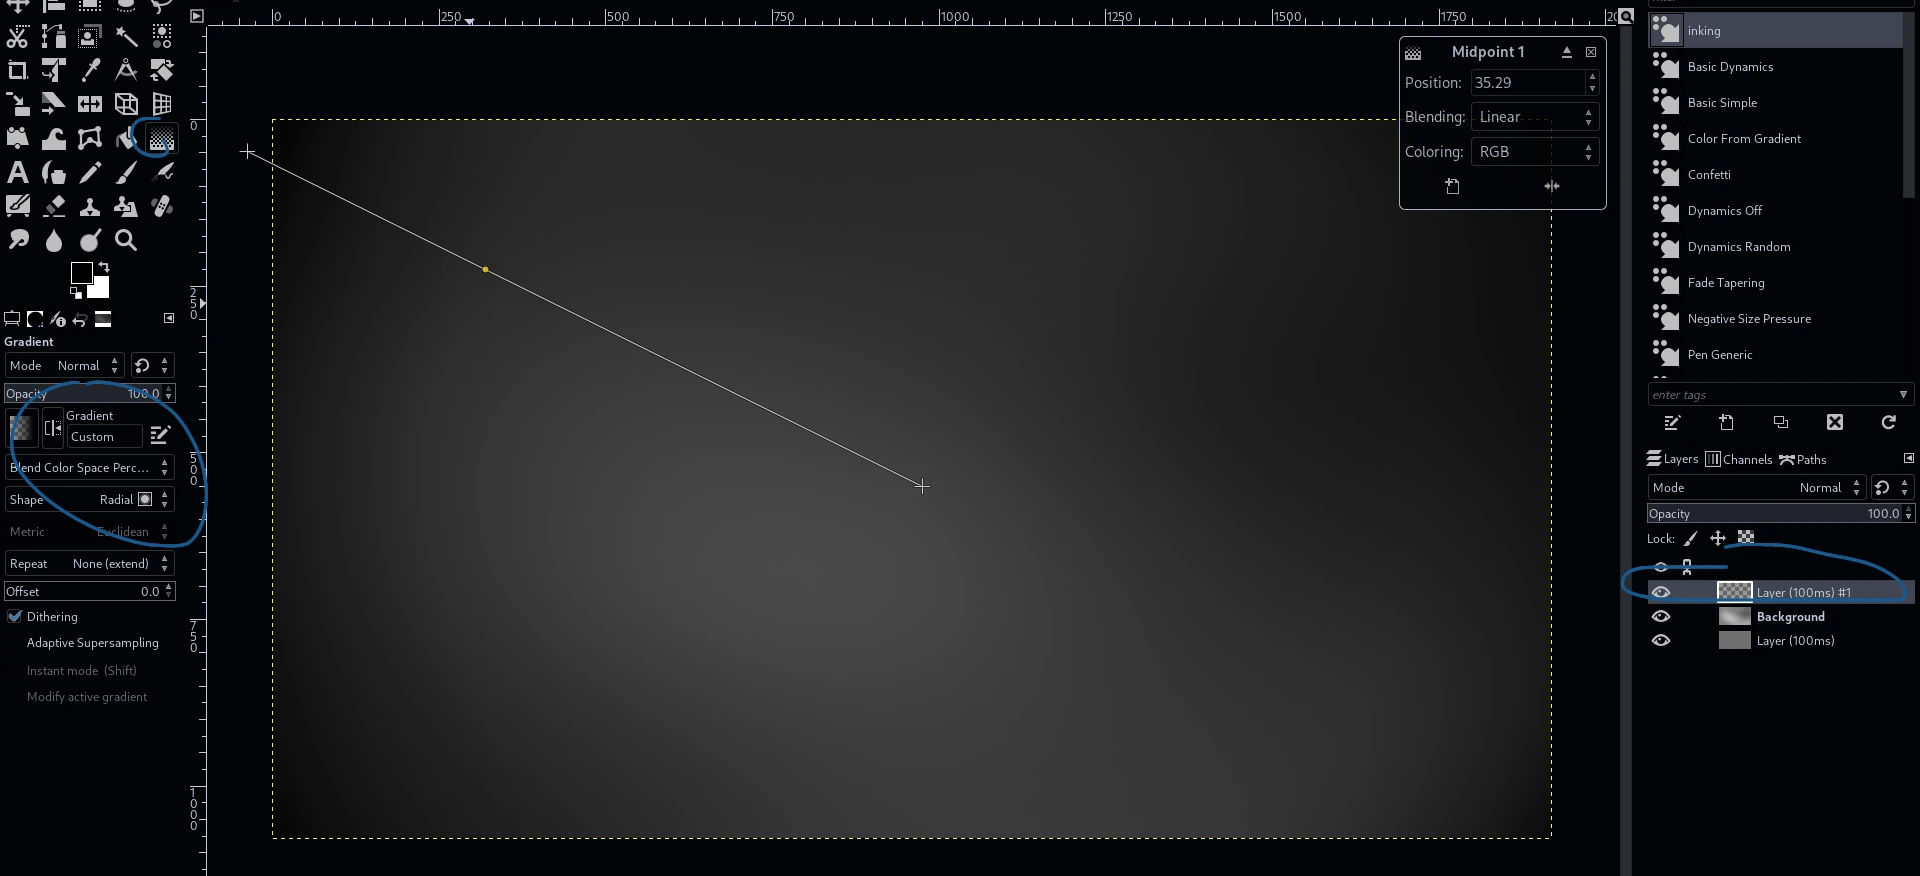
Create a new transparent layer, and make a gradient - black (or whatever you want), radial, transparent to black on the outside to make a nice shade. You can adjust the fading distance.
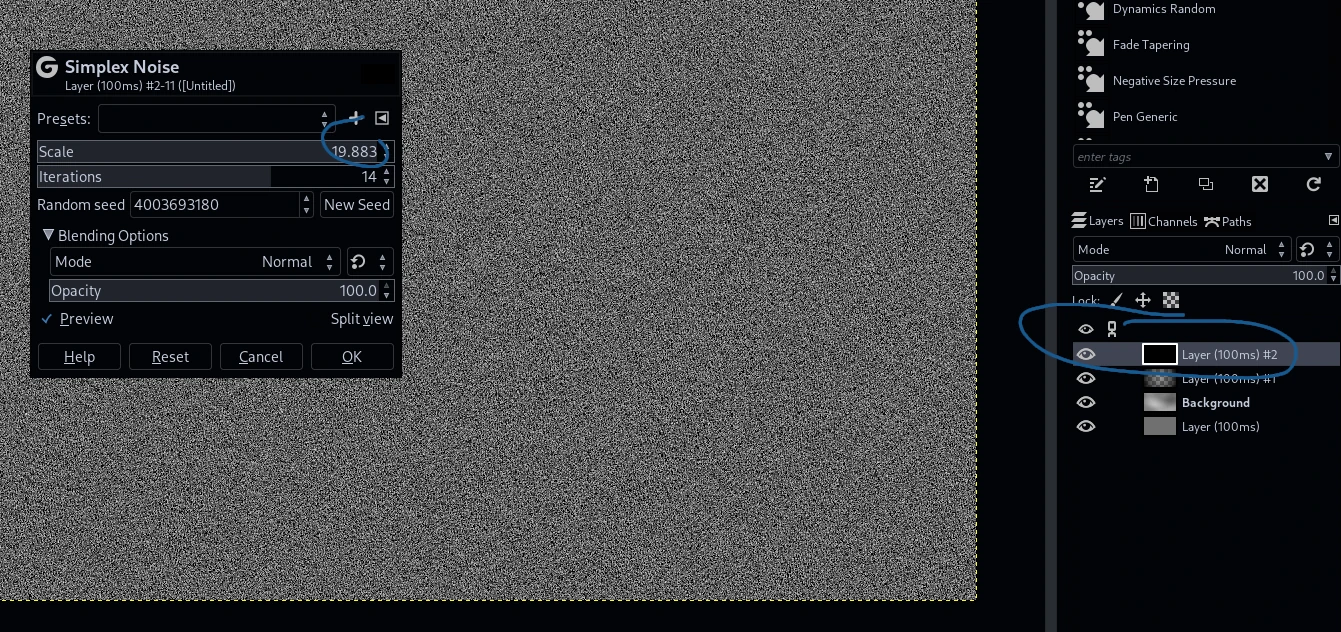
Create a new black layer and generate Simplex Noise. Ramp that numbers high.
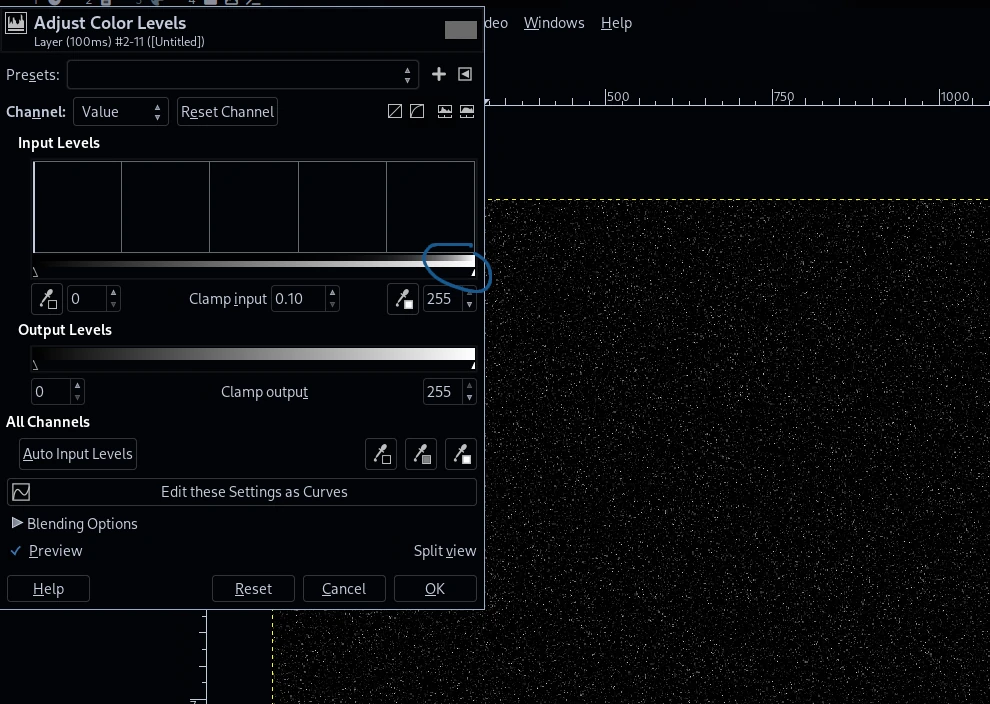
Still on that new layer, go to "Colors" menu > "Levels" and slide the middle pointer all the way to the right. That's how you can make low effort starry night.
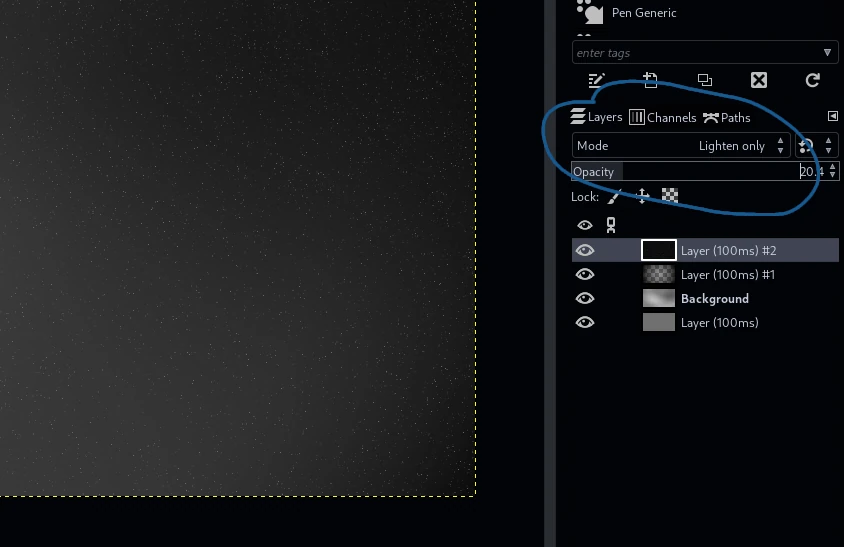
Change that layer's mode to "Lighten only" and lower opacity significantly. That's how you can make low effort movie grain. You might as well use "Color to alpha" function and remove black color for the same result. "Lighten only" mode is non-destructive and keeps the layer intact. From there you could create a layer group, move the stars there and in the same group create a layer above with "Erase" mode and round gradient to make these stars fade in the middle or on the outside. Note that if you want to try this, you need to remove the background from these stars - use "Color to alpha".
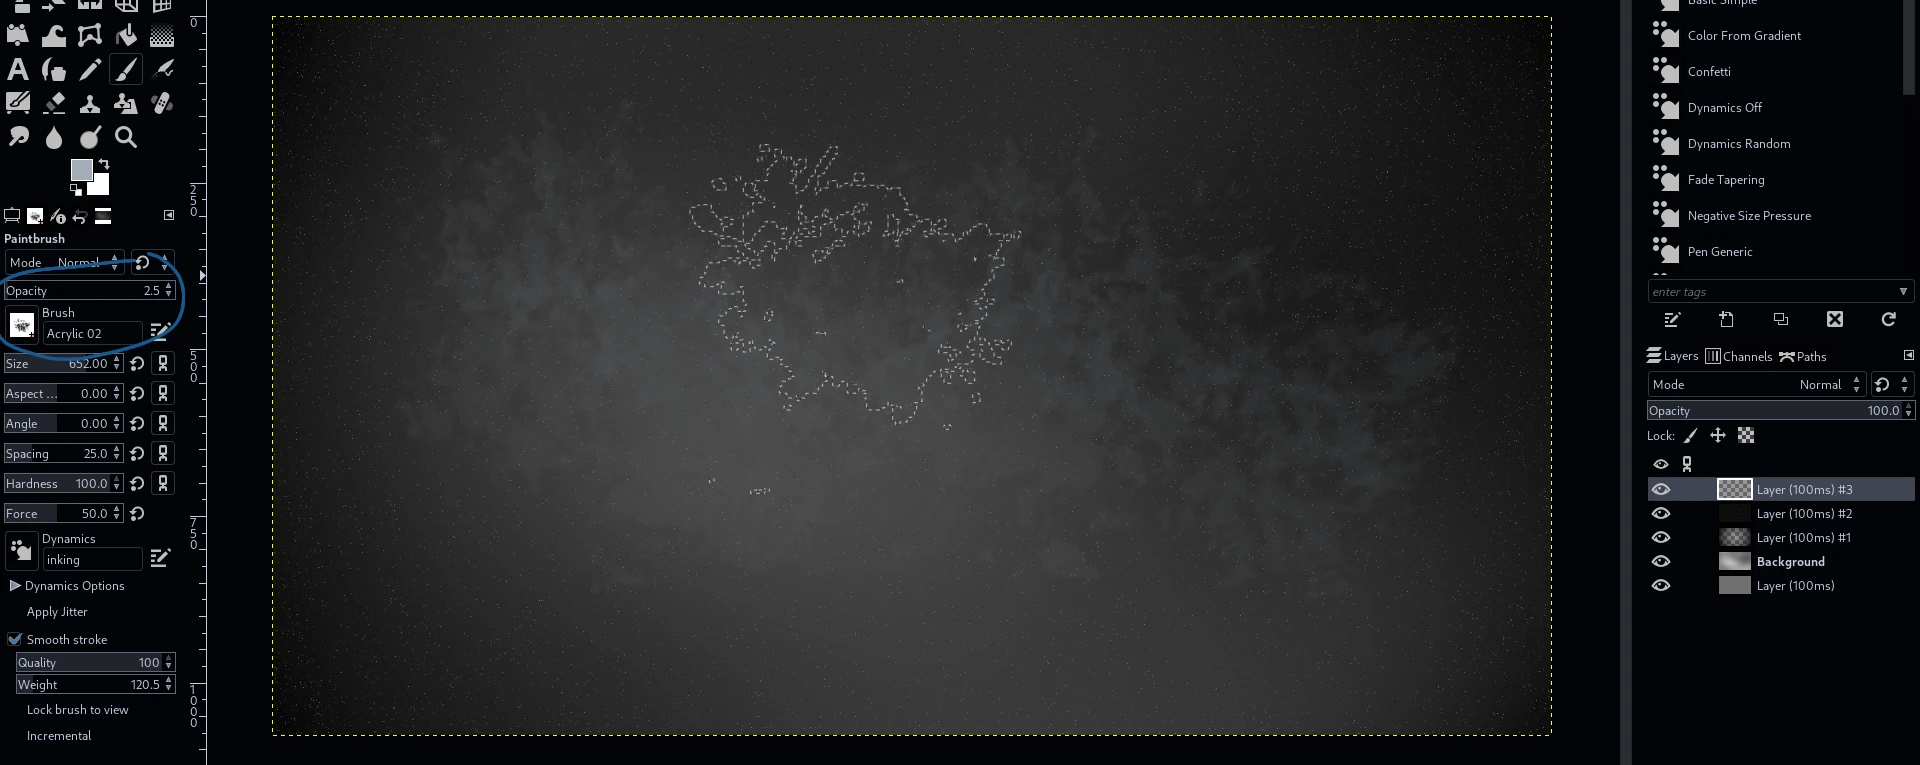
Use any stock texture brushes you wish to add some details or contrast. In the one above I made some frosty glow with those to make Ian stand out a lot. You can play with
opacity, size, all of the settings you have.
If that's too much work - there is an even simpler way. Just use any textured brush,
starting with darkest/biggest clusters to lighter/smaller size - a base for a gentle glow. Then, from My Paint brushes select watercolors - but only blending. And get to work on blending the base you just made to blur it around - but a textured blur!
------------------------
And here is how to copy that weird nebula featured in the (current!) background.
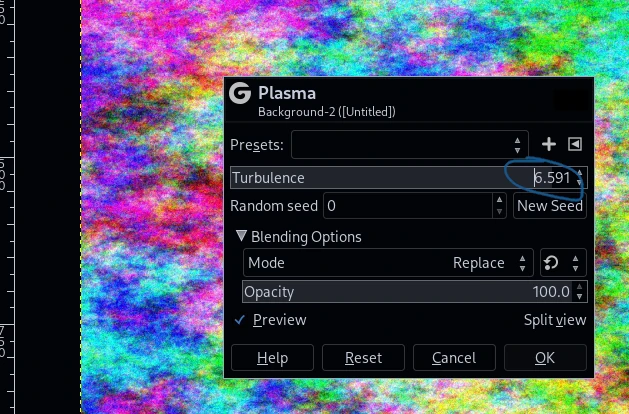
Start with a black background and generate Plasma Noise with high turbulence. generate random seed until you get the pattern you like.
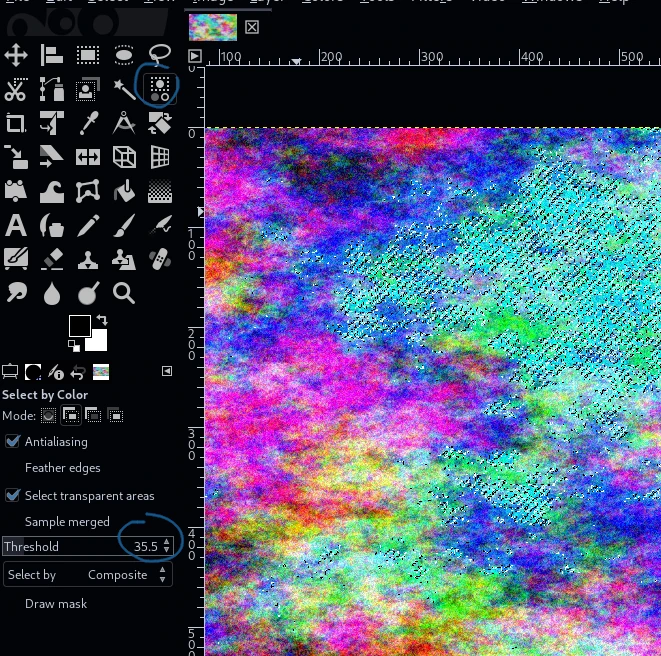
Use Color Selection Tool, set higher threshold and select the color you like, or more. Then in the "Select" menu use "Invert", delete, then "Select None".
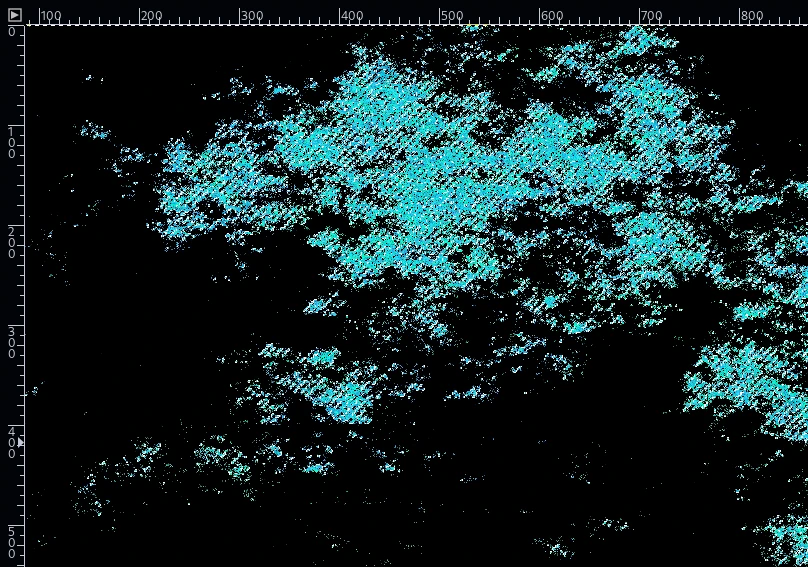
This should be your result. Just remember to deselect.
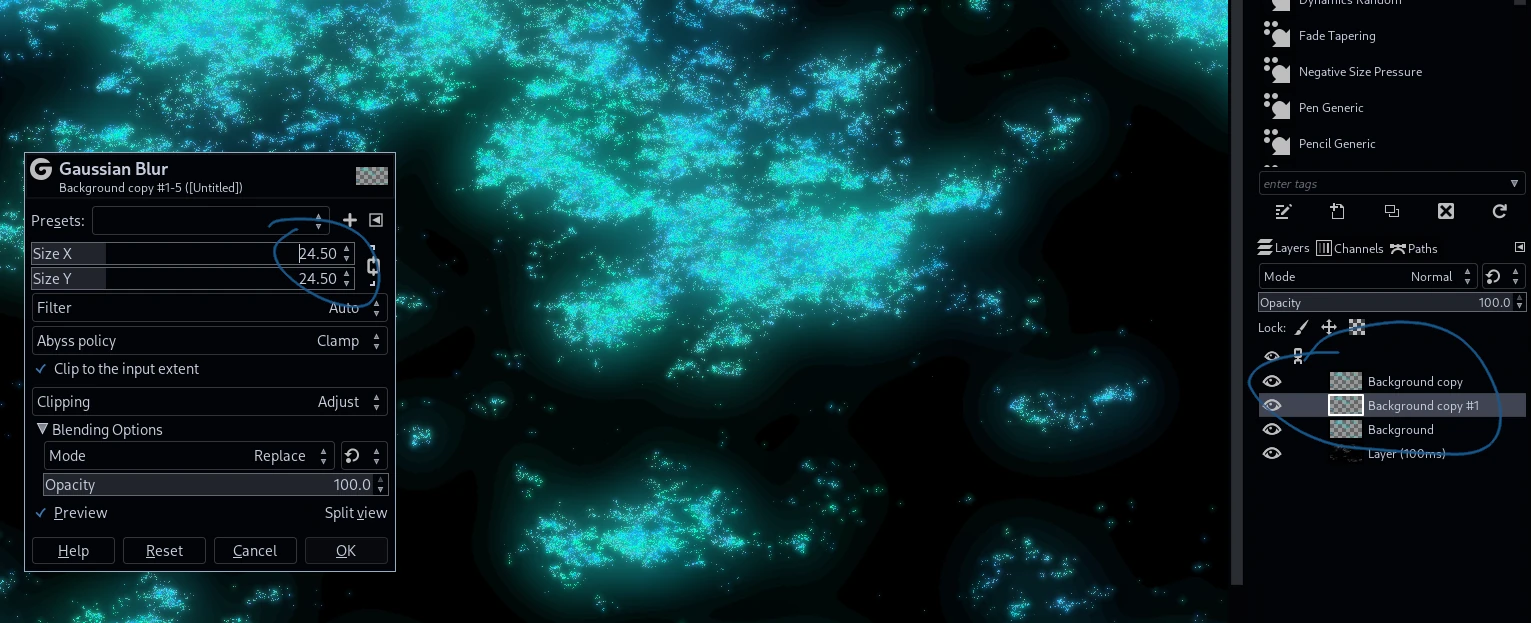
Copy the layer with you result, move below the original, and use Gaussian Blur - first one about 1.5-2.5. Copy and move the original again and this time set Gaussian Blur higher.
Underneath those layers use some textured brush with big size and darkened versions of your selected color too.
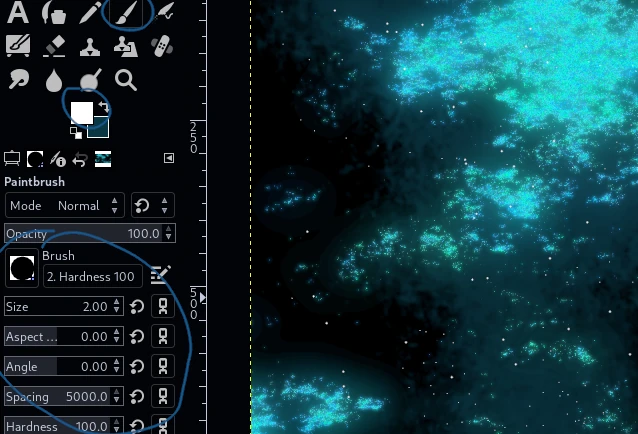
Use basic 1px white brush with 5000px spacing to create some little stars. Then on separate layer do the same with 2 or more, copy, move below, use low Gaussian Blur.
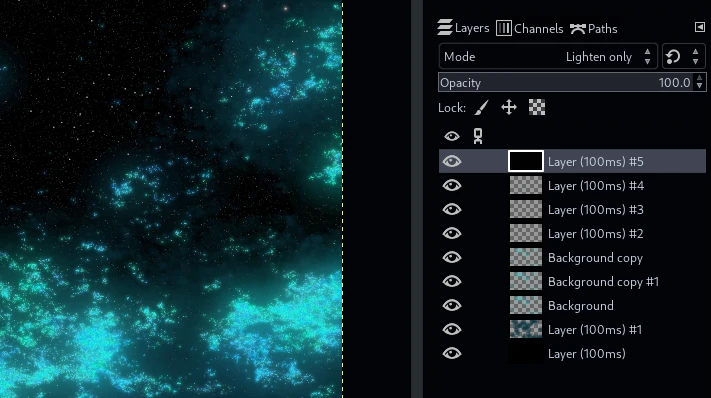
Use the "movie grain" thing to create a bunch of little stars nobody would bother do draw by hand. Later you can use some bright oil brushes to gently paint over the clouds to
give an illusion of glow.
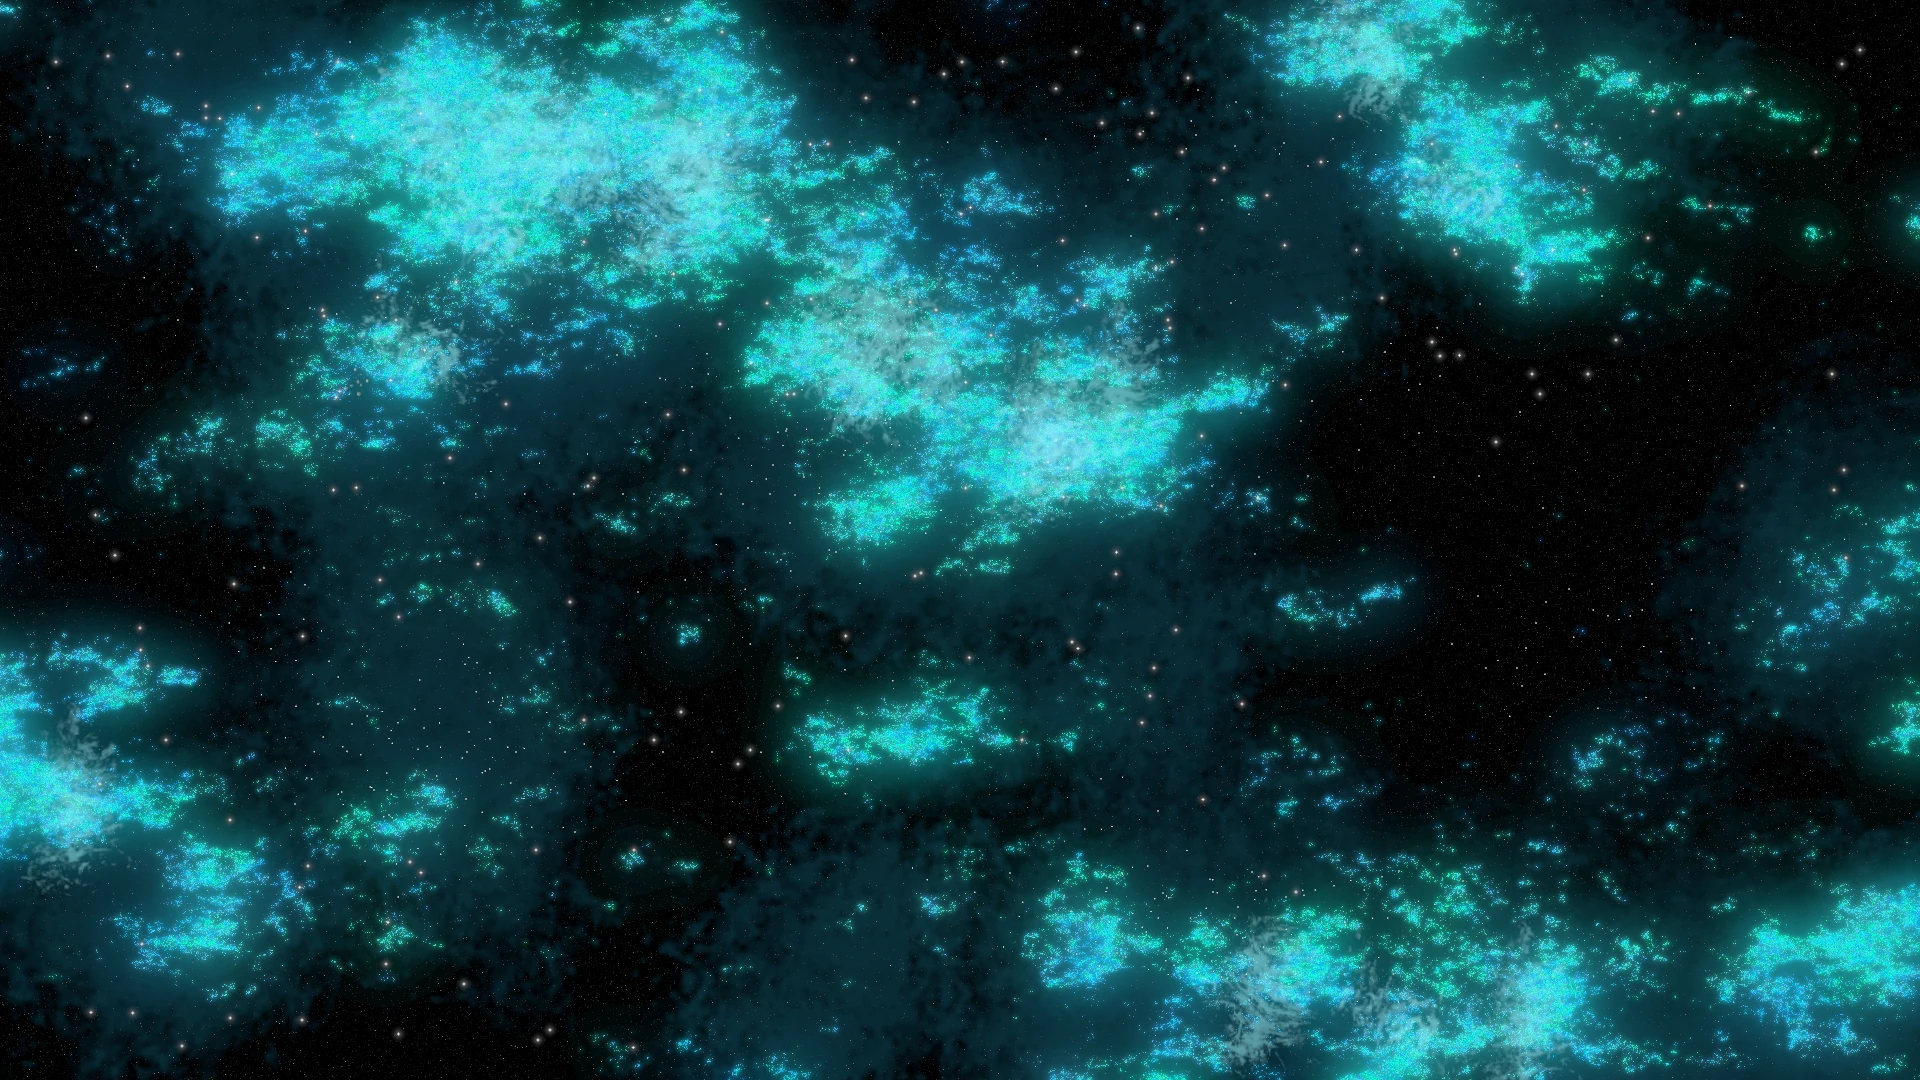
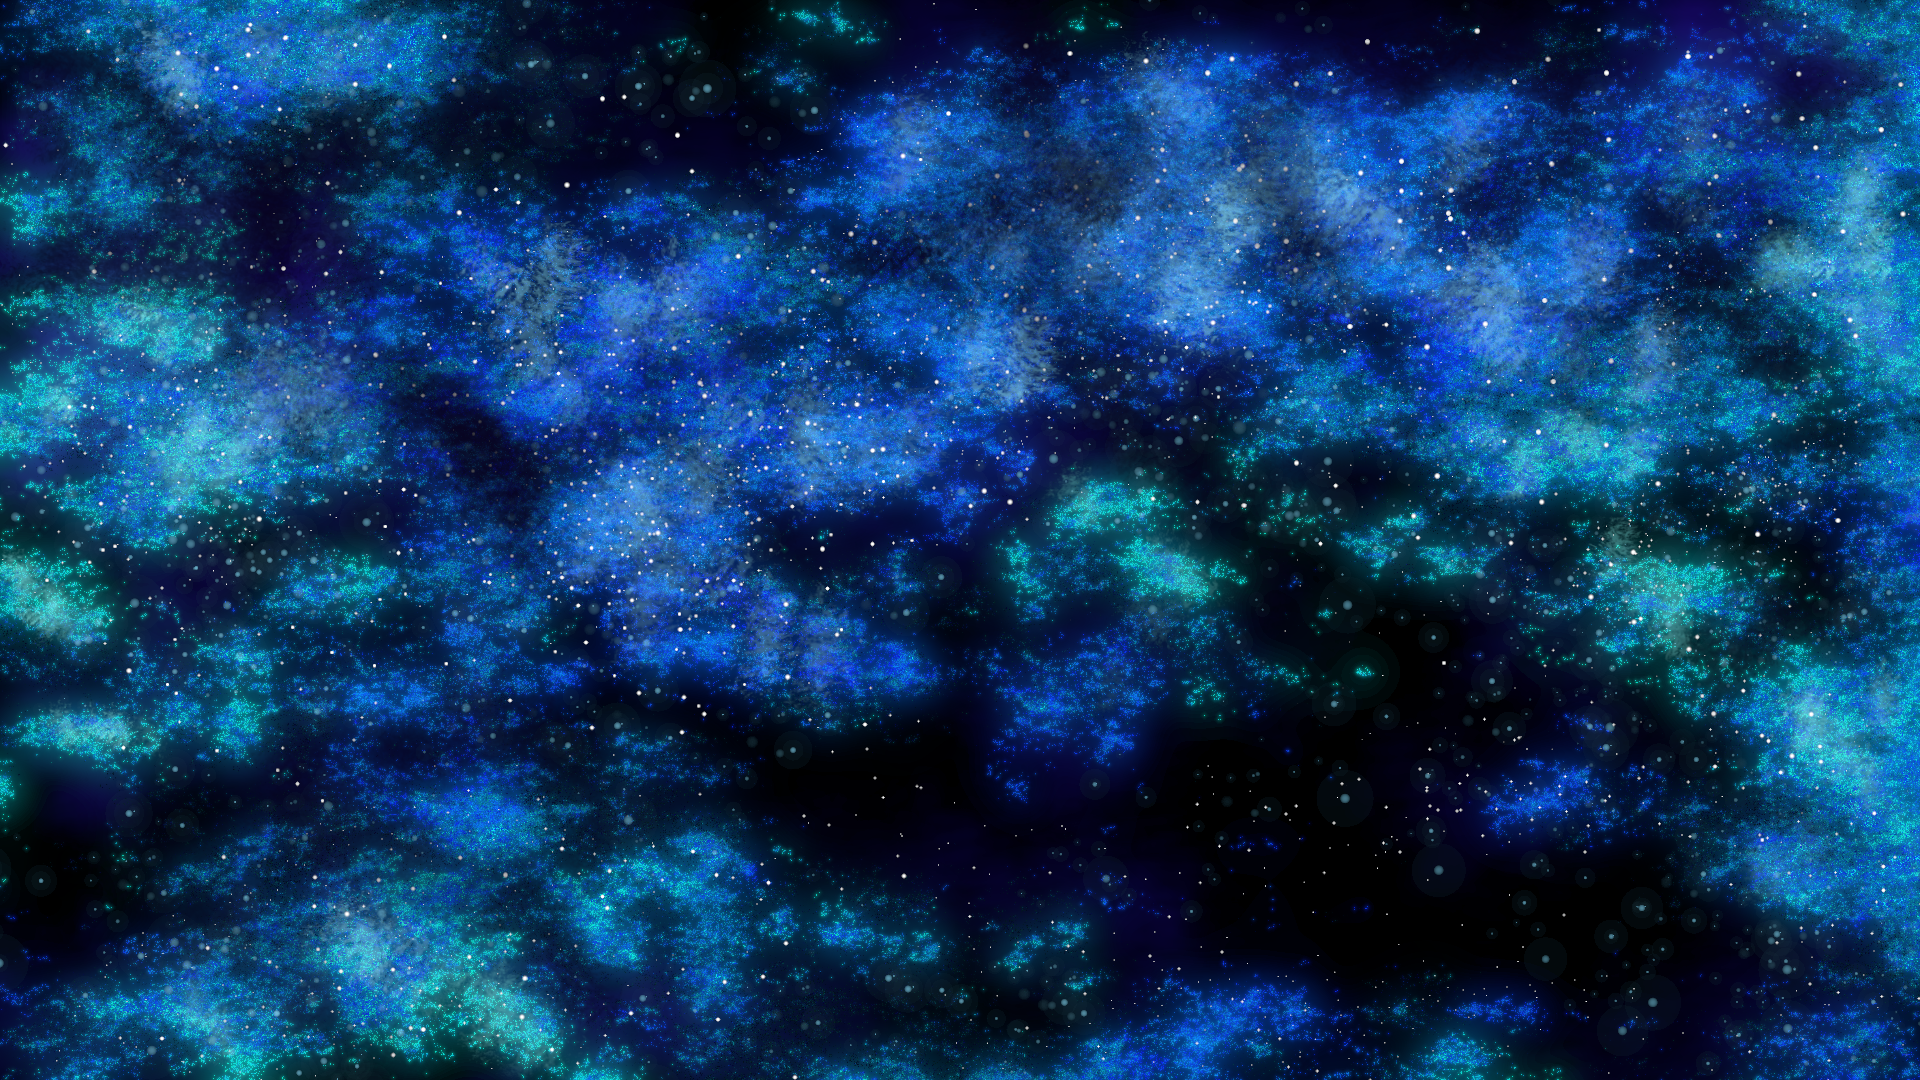
And here is the result. Can be placed under something i guess. This here was a quick "how-to",
but spending more than 5 minutes on this would for sure result in a lovely space wallpaper. Give it a try sometime!
Remember, the amount of details and steps included is up to you and your needs. You can strip the texture to a few basic steps shown here or add a bunch of details, layers, shading, fading, all you can think of.
.